

Figure 1
In this blog, we share quick steps on how to install your Orcas Flowmeter once your transducer spacing has been set and locked. SoundWater Ultrasonic Flowmeter set up is quick and easy, saving you time and money!
Follow these steps…
Rotate the tall, thin stainless knobs counterclockwise until they stop. This raises the transducers up above the meter footings.
Apply coupling gel liberally to the transducer faces, covering the entire bottom face of each transducer. (see figure 1)
Place flowmeter on pipe, assuring that the footings are flush with the pipe and the meter is aligned with the axis of the pipe.
Strap the meter to pipe with the mounting straps, clamping the straps into the cam cleats. (see Figure 2)
Rotate the tall, thin knobs clockwise to press transducers onto the pipe. Hand tighten only until seated firmly. Warning: Tightening too much can lift the meter away from the pipe, causing incorrect readings. (see Figure 2)
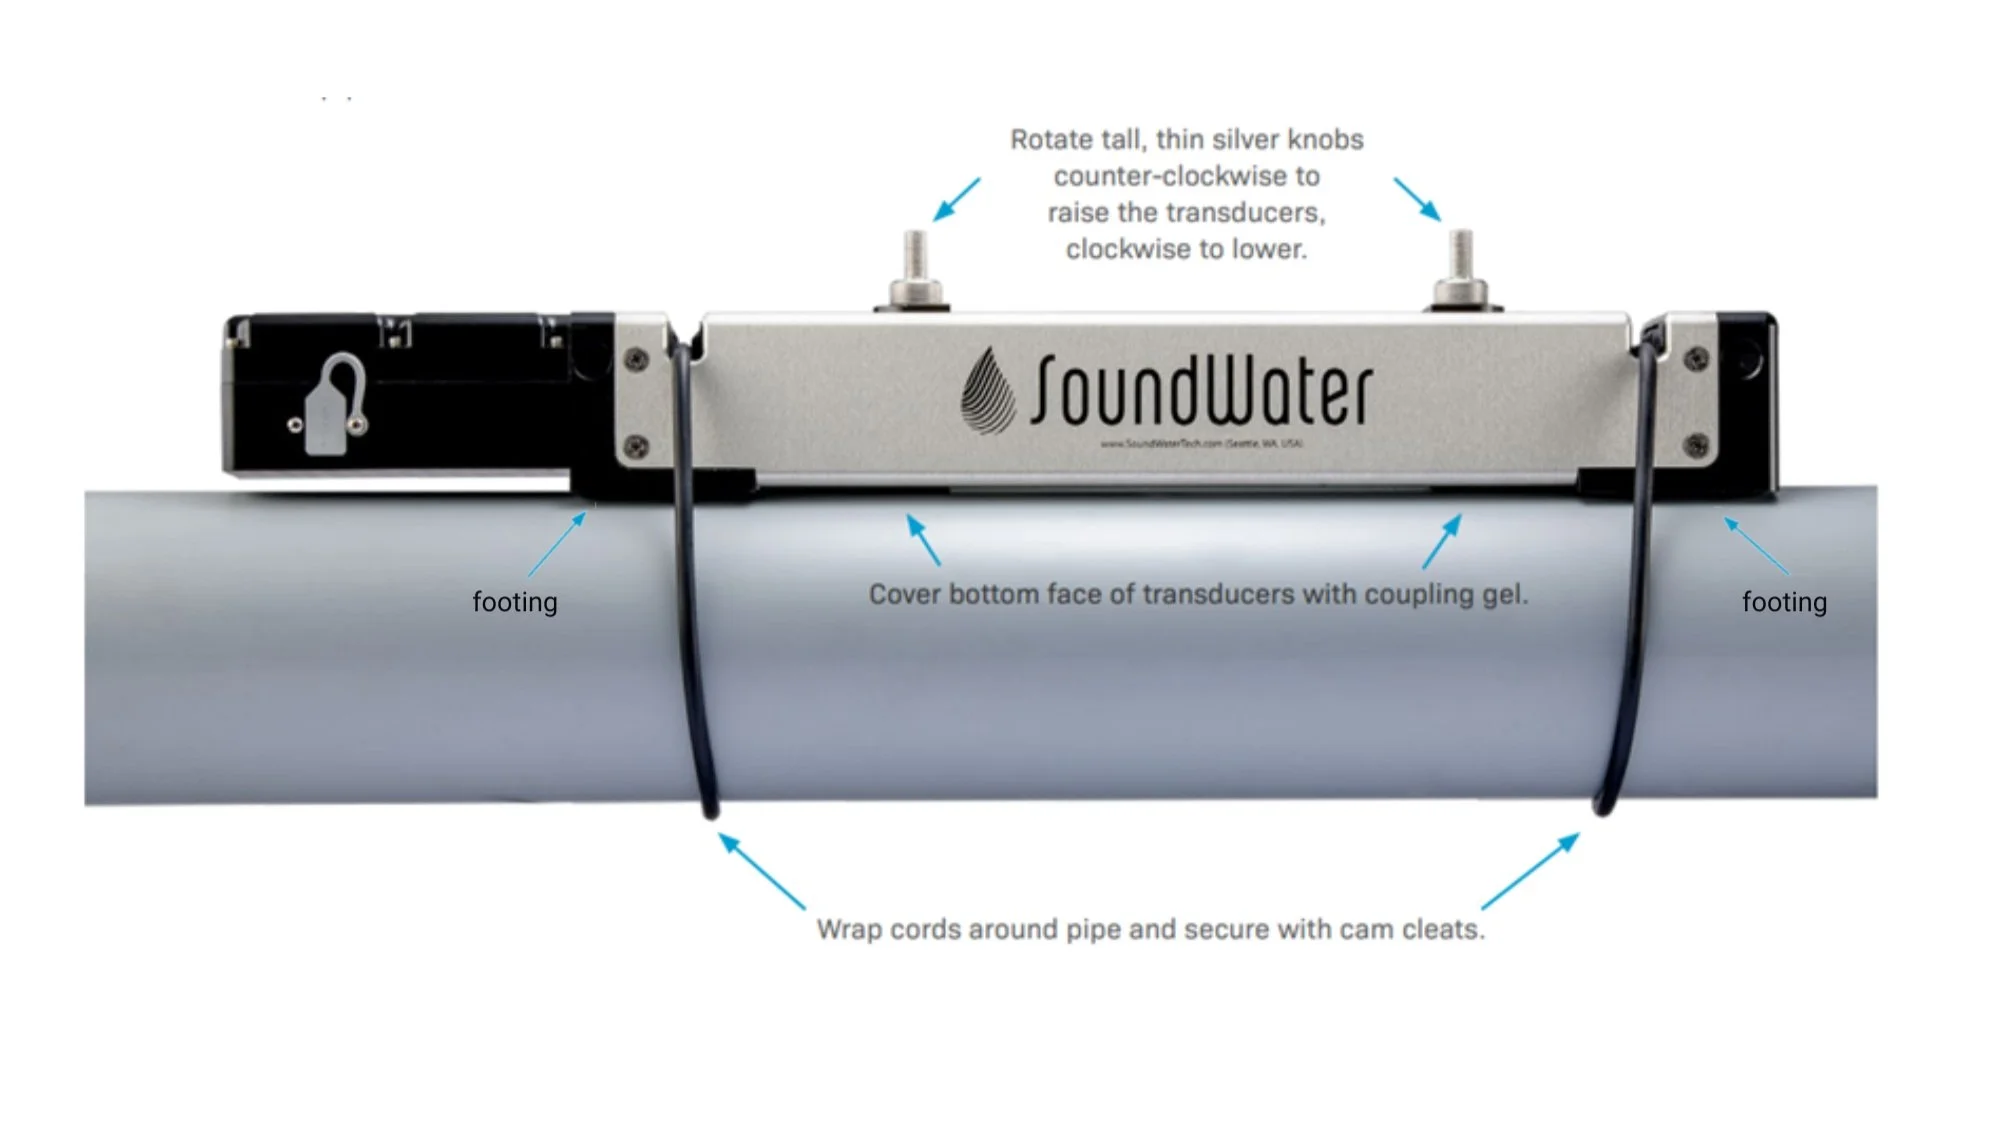
Figure 2
Dos & Don’ts
Dos
Do charge your Orcas at least once a month.
Do allow the flowmeter to complete full charge cycles until the LED stops flashing and the flowmeter automatically turns itself off.
Do store your Orcas in a dry, indoor area when not in use.
Do keep your Orcas in its protective case when transporting to prevent damage.
Do gently clean the transducer pads regularly with isopropyl alcohol to prevent hardening and build up of used coupling gel.
Don’ts
Don’t charge with any charger other than the 12W charger supplied. Other chargers may damage the Orcas.
Don’t store, transport, or use your Orcas where the device may exceed 185˚F (85˚C)—battery may leak or explode!
Don’t bang or drop the Orcas on hard objects or surfaces.
Don’t nick the transducer pads.
And never hesitate to contact us with questions!
